The Miracle of Growing Food Regeneratively
Creating Local Food Security & Healthy, Vibrant, Regenerated Living Soil, & Nutrient Dense Food
HOW TO GROW GRAINS
Growing whole grains is simpler and more rewarding than most people imagine. For small grain production, it is essential to grow grains that do not have inedible hulls (husks). Hulls are very difficult to extract from some grains, especially for small-scale growers, however there are two ways around this. First, grow grains that do not have hulls, like Amaranth, or at least loose hulls like most wheat varieties that fall off when the seed is threshed out, and secondly grow specially selected strains of grains like oats and barley that usually have hard tightly held hulls – these special strains are bald, hulless varieties.
As with nuts, it is very important to realise that grains contain numerous enzyme inhibitors that reduce the body’s ability to digest the nutrients they do contain – however this can be easily alleviated – (see the section - Fermenting Grain Etc).
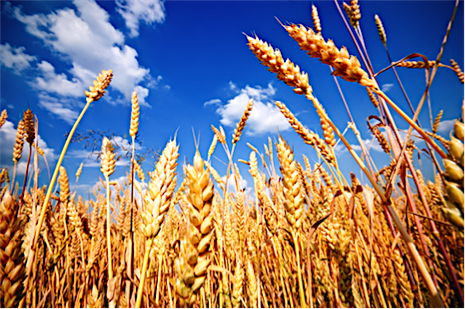
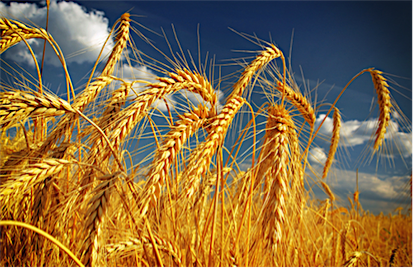
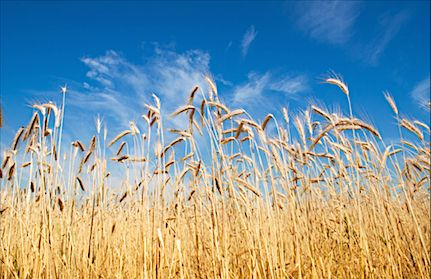
WHEAT (Triticum spp) Along with rice and maize, wheat has been one of the most successful and widely grown grains over thousands of years. Wheat belongs to the grass family, and has been cultivated since 5,000 B.C. Wheat is not difficult to grow. You can plant a small patch that will furnish part of your family's grain needs.
The plant's straw can be used for bedding animals – eventually to make compost, employed as a mulch, used as one of the main ingredients in making compost, or chopped up in the field to provide organic matter for the soil.
Yields:
With as little as 90 square metres (107 square yards) of land, backyard farmers can grow enough wheat to harvest 20 kilograms (44 pounds) of grain - and those 20 kilograms can be ground and baked into around 50 loaves of fresh bread. You will need about 50kg (110 pounds) per person per year for all your needs – that is bread making, pastries and all other uses for wheat flour. Yields can vary, but 5.0-5.8 tonnes per hectare (2.0-2.3 tons per acre) should be achievable. This is equivalent to 0.5kg (11 pounds) per square metre (yard), to be very conservative let’s halve that number to account for the worse case scenario. You will therefore need to grow 200 square metres, or 14 x 14m (240 square yards, or 15 x 16 yards) per person – that is still an incredibly small amount of land if you think about it! For a family of four this would be 800 square metres (957 square yards), or 400 square metres (478 square yards) in a good year.
Soil Preference:
Fortunately, wheat can be grown on a wide range of soils and climatic conditions as long as the land is not wet. Wheat does not like acid wetland, e.g. peat land, or badly drained land. The ideal pH for wheat is 6.4 – which is what we should be aiming for with the majority of our domesticated crops.
Feeding:
Although wheat has low nitrogen requirements and grows long weak straw when overfed – which can blow down easily (lodge) before harvesting – some nitrogen should be provided through the addition of twenty tonnes of well rotted manure or compost per hectare if you are starting with bare land that has already had previous crops.
Alternatively, grow after grass; this fits in well with the keeping of grazing animals, sheep, cows etc. Winter sown wheat does well after grass that has been ploughed in late summer, which gives the grass time to start rotting down. The grass will have to be grazed off short with animals, or cut short with a mower before ploughing. If you haven’t got a tractor, maybe you can get somebody with a tractor, or contractor, to plough the plot for you, as long as you explain you only want it ploughed only 10-12cm (4-4¾in) deep, 15cm (6in) maximum. To plough any deeper is only to lose the value of the decaying turf.
If you are growing large areas of vegetables, then wheat should be included in your rotation regime. Wheat could follow potatoes, or other crops that have been well fed with rotted manure or compost before. Another good crop wheat could follow is peas or beans, as long as you leave their roots in the soil to release the nitrogen from their root nodules as their roots break down.
Varieties:
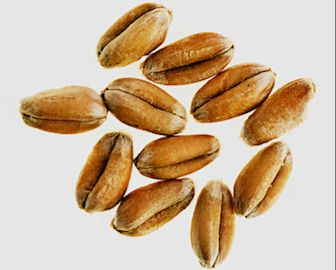
The four wild species of wheat, along with the domesticated varieties Einkorn (T. monococcum), Emmer (T. dicoccum) and Spelt (T. spelta), have hulls. These more primitive wheats have toughened hulls that tightly enclose the grains, and are very difficult to extract. The result is that when threshed, the wheat ears break up into spikelets. To obtain the grain, further processing, such as milling or pounding, is needed to remove the hulls or husks.
In contrast, Durum wheat (T. durum) and common wheats (T. aestivum) are called hulless; in reality they do have hulls, but they are fragile so when the wheat is threshed the hulls break up releasing the grains and the husks are winnowed away leaving the bald grains.
So, if you want to grow wheat for bread making, and other uses, then I would suggest you stick to either Durum, or some of the high quality traditional varieties of common wheat. They may not yield as well as more modern varieties, but they will be richer in nutrients and taste better. I have not included Spelt wheat, because it has hulls that are difficult to get off, but there is a hope that small scale drum rollers will eventually be available to de-hull grains, but at the moment there aren’t any – unless somebody knows where to source such equipment?
All grains contain phytic acids and other anti nutrients and were traditionally always either fermented (sour dough), sprouted or soaked and cooked for a long slow period to make the grains digestible and nutritious for the human digestive system.
Kamut: This wheat has a long history; it was known to be around at least 5,000 years ago. The grains are far larger than other wheat and do not have a hull so require no hulling before eating. The grains are hard and glossy. The flour makes delicious sourdough bread. The whole grains are also delicious served as one would serve rice soaked and long cooked, and it is also great coarsely ground for making 'cream of wheat' porridge.
Konini Wheat: This is an early commercial purple variety, bred from a very ancient line. It only grows to around 80cm (31½in) high, so it's easy to net, and it is a heavy cropper. Konini threshes out of its loose hulls quite easily. Like Kamut it makes great tasting sour dough bread and it also makes delicious sprouted wheat cakes, as well as a great rice substitute when eaten whole after long soaking and slow cooking. This is the one we grew and harvested successfully at Waimarama Community Gardens, in Nelson, New Zealand.
THE FOLLOWING GROWING AND HARVESTING INTRUCTIONS CAN BE APPLIED TO MOST GRAINS.
Sowing:
Having ploughed the land, or following a vegetable crop, you will then need further cultivation to prepare a seedbed. Even if the land has already been cleared and previously cropped, it will still need to be prepared by cultivation of some sort. I would seriously stay away from rotary hoes, whether mechanical hand versions or tractor versions, because they are very destructive of both soil structure and earthworms, and they create a hard pan at the base of the cultivated top which inhibits root growth and water penetration.
To avoid a lot of weeds in your crop, it is best to make time to harrow (or on a small scale hoe) the ground every week for several weeks, if the weather is dry. This will encourage the weeds to germinate and be killed off each time you harrow (or hoe on a small scale) ensuring a reasonably weed free crop of wheat.
To sow wheat, hand rake, disc (with disc harrows on a tractor) or harrow the soil with spiked chain harrows. Broadcast the seed and lightly rake the surface. That's all you have to do until harvest time. The time to sow will depend on whether the wheat is a spring or winter variety. Most wheat varieties are sown in the autumn – April/May (southern hemisphere) October/November (in many northern hemisphere countries). Winter varieties of wheat benefit from frosts, which cut back the young growth, encouraging ‘tillering’, which produces multiple shoots and larger crops.
On a small plot, you can broadcast the seed by hand, but larger plots can be planted more efficiently if some sort of mechanical device is used.
Hand broadcasting is done by having a shallow sack or basket attached over your shoulder by a strap. You will need to sow 225-235kg of seed grain per hectare (200-210 pounds per acre), which is 22-23g per square metre (⅗-⅘oz). Before you start, sprinkle 22g (⅗oz) of grain on a square metre (yard2) patch of land to get an idea of how thick to sow. Take alternate handfuls of grain, swinging your arms in a broad steady ark and flicking your wrists out sideways – left and then right – releasing the grain in a steady stream and trying to cover the ground as evenly as possible as you walk forwards. Altering your walking pace will achieve the correct coverage of seed. Then harrow or rake in the seed making sure most of the seed is covered by soil to a depth of around 1-2cm (⅖-¾in).

Seed Fiddle
I used a seed fiddle (broadcaster) to sow my wheat. These are usually used to broadcast grass and clover seed, but they can be used to broadcast grain as well for small areas. They can sometimes be found in farm sales.
Here is a picture of a farmer using a seed fiddle. It is easier to get an even spread of seed with a fiddle. All you need to do is adjust to flow of seed by opening or closing the control slider on the machine, whilst swinging the bow from side to side in time to your paces.
After that I used to harrow the soil with a tractor, or you could rake the seed in by hand on a small plot, with a large wooden rake.

Using a Seed Fiddle
Another way to sow grain is with a seed drill towed by tractor, which cuts shallow grooves in the soil and drops the seeds in and covers them with soil as it passes. A seed drill does a precise job of planting the seeds in nice, evenly spaced rows, at whatever depth you want. Second-hand drills can be bought at farm auctions or from farm equipment dealers. The drill, however, is not really necessary unless you are sowing a large quantity of wheat and you have a tractor or horse to attach it to.
Maintenance:
Harrowing in the spring with a chain harrow helps to kill small weeds and induces tillering – i.e. causes the plants to produce more side growths and therefore more seed heads. For those who like to use Biodynamic sprays, one can spray preparation 501 first at the four-leaf stage and after flowering to encourage good seed production. Do NOT spray 501 half way through the growing season, otherwise it will encourage early flowering and a poor crop. Apart from praying for rain at the right times and dry weather for harvesting, there is little else to do.
Harvesting:
There are two basic ways of harvesting wheat and other grain crops by hand.
1. First is cutting the wheat with a special grain sickle, which has backward pointing fine teeth (or nicks) along a sharp blade. One wraps one’s free arm around away from one’s body and back around a large bunch of wheat stems. Tightly holding the bunch under one’s arm the sickle is used like a saw, drawing the blade backwards to cut the stems. The cut bunches are then laid down on the ground in neat rows, for tying up later.
2. The second, more productive way is to cut the wheat with a long bladed scythe. However, if you cut the wheat with an un-adapted scythe, the grain will fall in all directions, making it very difficult to collect and tie together. This problem is overcome by attaching a ‘sail’ to the scythe. A bent wooden or metal rod is attached to the base of the blade where it meets the base of the shaft. The rod is then bent in a loop up to the base of the bottom handle and secularly attached. If the grain is a tall variety this hoop will be sufficient, but better still is to attach a ‘sail’ to the hoop made of a cut opened hessian sack, or other sheet. This will ensure the cut bunches of grain land neatly on the ground all facing the same way.
Below are pictures of a loop attached to a scythe with a spacer rod. A man scything with a loop, and a more elaborate, and I think unwieldy, version is a ‘bale’ – a rake contraption. I can see it’s neat, but the simple loop and sail I used on our farm worked perfectly well.

A loop with a spacer rod

Scything Oats with a loop

Scything with a 'Bale'
Having cut your wheat it will need tying into sheaves. Have somebody else, or yourself, gather up enough stalks that you can conveniently handle and bang the butt ends down on the ground to level the stems. Then, whilst holding your free hand round the sheaf, draw out 4 or 5 straws with your other hand and twist them tightly together between both hands; then slip them round the middle of the sheaf, twist the ends together tightly and tuck the ends under the belt you have just made. This will secularly hold the sheaf together.
When all the sheaves are cut and tied into bundles, you and your helpers will need to stack them in stooks in the field to finish ripening and drying. The stooks are made of 6 sheaths. Two sheaves are lifted one under each arm and the butt ends banged down on the cut stubble about half a metre apart and then the heads pressed and rubbed together. These are your ‘king’ pair on which the other sheaths rest. Two more are banged down next to the ‘king’ pair and lent against them and two more on the other side. You now have your tent shaped stooks:

STOOKS OF WHEAT AT OUR FARM IN THE UK
The grain will withstand a certain amount of rain, as long as it is not prolonged, and the grain will continue to dry out. When the grain is hard enough to be difficult to crush between your teeth it is ready to store in a barn until threshing.
I would seriously suggest storing your sheaves under cover of a Dutch or other barn. It is far more difficult outside, because you will have to slope the stack outward as you build and then thatch the top to shed the rain in the traditional way. Build your stack of sheaves under cover by laying logs, around 8cm (3in) diameter, out on the floor where you are going to build your stack. The stack can be round or rectangular.
Lay the first layer of sheaves with their butts outwards and the heads into the middle. Then lay the next row inside, again with the butts outwards until you have built the first layer. Then continue building upwards, until finished.
Threshing:
If you only have a small amount to thresh, you can bash the heads of the sheaves over the back of a chair, having first laid a plastic sheet out on the ground to catch the grain and chaff (husks).
For larger amounts, it’s worth making a homemade flail, also called a stick and a half. The handle should be made of ash, or hickory or a similar wood – i.e. strong but flexible. You could buy a broom or long spade handle. It should be cut to about 1 metre (3ft) in length. The ‘half stick’ or flail head should be about ½ meter (18in) long and made of a very hard wood, preferably slightly thicker than the handle, and it will benefit from being a little knobbly. Traditionally these were made of hawthorn or holly, but any hard native wood will do.
There are several ways to make the universal joint that attaches the ‘stick’ and ‘half’.
1. On a lathe, or by hand, turn a smooth grove 1.25cm (½in) from the end of the handle where it will join the threshing ‘half’, either with a rounded chisel (in the case of lathe turning) or a round course file, about 6mm (⅕in) diameter.
2. Carve another identical grove 1.25cm (½in) from the end of the threshing ‘half’.
3. Using leather strip, ½cm (⅕in) square (or better still round) – tie around both grooves, securing with a double knot, but loose enough to turn round in the groove, whilst being tight enough not to slide off. Make sure there is enough leather cord spare to join the two together. The end result will be like a universal joint, the threshing ‘half’ being able to swing around the end of the handle.
Another version is shown in the first and last photographs, where two stiff leather loops are screwed to the end of each sticks and a leather thong or metal loop connects the two sticks together. This is not as flexible as the one described above, but will do the job adequately.
The middle example uses a chain.

Examples of leather flail joints

Flail with a chain

A flat beater and joint
On a wooden floor of a barn, or concrete slab, or dry hard piece of land, lay out a large thick plastic sheet, or tarpaulin. Having untied some of the wheat sheaves first, spread them out about a 5-10cm (2-4in) thick. Then, whilst holding the handle of the flail parallel to the ground, swing the handle in a circular motion, by holding the handle near the end and using the other hand to swing the other end in a circle, so that the threshing ‘half’ swings round and round. As the ‘half’ comes round bring it down onto the seed heads of the wheat with a thwack!
This action should be reasonable effortless, certainly a lot more effortless than using a straight stick or swinging the flail over your head. The old boys who used to thresh grain all day long in the old days, were the ones that found a method of hand threshing that involved the least amount of work. It is still hard work, but a lot less than it could be.
After each batch of grain has been threshed, remove the straw and sweep up the grain and chaff (hulls) to one side, or bag up.
Winnowing:
To remove the chaff and small bits of broken straw and dust from the grain the grain needs winnowing.
• On a small scale this can be done by placing some of the grain in a shallow basket and tossing the grain up and catching it again on a windy day. The chaff is blown away and the heavy clean grain falls back down into the basket. You can use a hand fan or electric fan if there is no wind.
• Another larger version is to spread a thick plastic sheet or tarpaulin out on a windy day, weighted down at the edges. Steadily pour the grain from a bucket or other container onto the sheet, allowing the wind to blow the chaff out beyond the grain. The chaff can then be used in the compost, or in hen’s nest boxes, etc., and the grain stored.
• On an even larger scale, lay a large sheet or tarpaulin as before, below a window, or an opening in the upper story of a barn. And on a windy day pour down your saved grain onto the sheet. The best quality unbroken grain will land below, broken grain and some course material will land a bit further on. The straw bits and hulls will drop further on and the dust will blow away.
Storage:
As long as the grain is dry, hard and clean (test between your teeth), then as long as it is kept dry it will last for years. Only grind into flour as you need it – there is nothing as good as freshly ground wholemeal flour.
There are rats, mice, grain moth grubs and weevils that would love to get at your stored grain given a chance! Storing grain in a metal grain bin is the safest way of storing it. This will keep out rats and mice, and even moths and weevils if there is a good seal on the lid.
Another way to store grain, on a larger scale, as long as you have some very good cats to keep the mice and rat populations down, is to spread it out about 20cm (8in) thick on the upper floor of a barn. This is how we kept our grain on our farm. Rats and mice cannot make nests in loose grain and they are very exposed to being hunted or trapped.
Milling Flour:
There are many types of small flourmills available, hand and electric, stone or steel plates.
USA: Pleasant Hill Grain info@pleasanthillgrain.com
New Zealand: https://www.flour-power-mills.co.nz http://www.providentliving.org.nz/grain-mills
Australia: http://healthykitchens.com/electric_flour_mills_and_handmills.html
Also: ‘Hawos’ and ‘Komo Grain Mills’, both hand and electric versions are sold in many countries and worth looking up.
Saving Your Own Seed:
Saving your own wheat seed is easy. Calculate what your family or group needs over one year, plus half as much again. This way you will have enough to save for next year and some over in case of hard times.
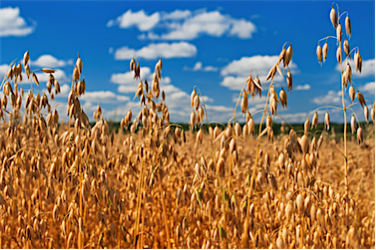
OATS (Avena sativa)
It is believed that ancient Slavic peoples first grew oats during the Bronze and the Iron Ages. Oats were grown for grain in Europe and for animal feed in Asia Minor during the early Christian era. In central Europe, oats have been used for centuries. Today, oats are grown in practically every country in the world.
Oats can grow in wetter, colder and more acidic soils than wheat; that is why it was the staple food of the Scots for so many centuries rather than wheat. In his dictionary in 1755, Dr Johnson wrote:
“A grain which in England is generally given to horses, but in Scotland supports the people.” To which his Scots biographer Boswell replied: “Aye, which is why in England you'll raise fine horses, while in Scotland we'll raise fine peepul."
Having been diagnosed as being a Celiac several years ago after a prolonged period of worrying symptoms, the one grain I do miss, even more than wheat, is oats. Maybe it’s because I have Scottish blood. I liked my porridge and the many other uses for oats. Oats have a unique flavour that cannot be replicated. I have found a mixture of 1 part flaked quinoa, 1 part flaked buckwheat and 1 part flaked millet is a reasonable substitute, but it is still not the same.
Hulless Oats:
There is of course the problem of most oat strains having hard and difficult hulls to get off and for small farmers or communities, impossible to get off, making ordinary varieties good only for animal feed. Fortunately, there are traditional bald varieties, or hulless oats. Hulless oats get their name from their very loose hulls or outer covering that separates at harvest time leaving the grain in a ready-to-eat form when it arrives at feed mills. Compared to hulless oats, other traditional oats are covered in a thin skin and a hard hull that needs cracking in order to remove it. Traditional oats have a 70 to 75 per cent digestibility where the hulless or naked oats are 95 per cent digestible. Hulless oats come in a large variety.
Oats are an excellent soil improver, making calcium more available for plants that follow them and a load of carbon in the form of straw to turn into humus in the compost heap. All you need is hand roller mill to be able to have your own rolled oats, but any seed mill will produce coarse oatmeal which makes great old fashioned porridge – although it takes longer to cook, it is worth it.
Yields:
You can expect yields of 3 tonnes per hectare (1.2 tons per acre), or 0.3kg (10½oz) per square metre (square yard). This is considerably less than wheat, but oats are a valuable crop in their own right. You can sow oats in the spring, but autumn sowing produces higher yields.
Soil Preference:
Oats can grow in acid soil conditions as low as pH 4.5, but will do just as well in pH 6.4.
Feeding:
Oats require a lot less rich soil conditions than wheat; as a result it can be grown after other crops that were fed with compost. It can also follow ploughed grassland (see wheat), but as oats are generally sown in spring it is best to plough in the grass in the autumn and allow the sod to rot down over winter. This will help to hold moisture, as oats are happier in moister soil than barley or wheat.
Varieties:
Avena Nuda (Avena sativa var. nuda): Avena Nuda hulless oats are erect, growing with fibrous roots and a mature height of up to 1 metre. The grain has a rapid growth rate in cool and moist growing conditions. Avena nuda is intolerant of heavy frosts but survives mild winters. The lack of a thick hull on the oats makes it well suited for use on a small scale. Avena nuda is well adapted to growing in all soil types and is recommended for early spring planting.
Sowing:
Prepare the soil and sow the seed as for wheat. Work out how much you, your family or group will use in a year and sow accordingly, taking into account that oats yield less than wheat at 3 tonnes per hectare (1.2 tons per acre). Sow 188kg per hectare (169 pounds per acre), or 18.8g (¾oz) per metre2 (yard2). This is higher than average, because hulless oats don’t germinate as well as hulled oats, which are sowed at 125kg per hectare (112 pounds per acre), or 12.5g per square metre (⅓oz per square yard).
For, Maintenance, Harvesting, Threshing, Winnowing– see WHEAT.
Storage:
The hulless oat grain has to be exceptionally dry to store well, as it doesn’t have a protective hull and can rot a lot easier than hulled varieties. Apart from that see wheat storage.
Milling & Rolling:
There are small-scale hand and electric rollers to make oat flakes, but personally a small ordinary hand or electric grinding mill is fine. For porridge, just grind the oats coarsely (groats) and cook for longer. My grandmother used to slow cook the groats in the evening and then wrap the covered pan in a towel over night to continue cooking, ready for breakfast.
Saving Your Own Seed:
As with wheat, calculate what your family or group need over one year plus half as much again. This way you will have enough to save for next year and some over in case of hard times.
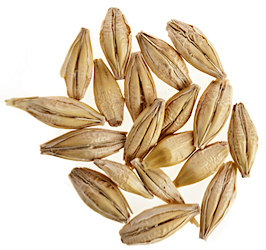
BARLEY (Hordeum vulgare) Barley is good food for both humans and animals. However, animals can eat hulled varieties of barley unlike us. For malting for beer making, hulled varieties are also perfectly OK. However for us humans, just like oats, there are hulless (bald) varieties of barley.
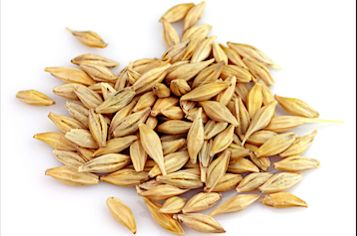
Genetic studies show that the mutation probably occurred around 8,000 years ago in a region that is now in modern Iran. Naked barley spread quickly throughout Europe, Asia and North Africa to become an important cereal crop in the Neolithic and Bronze Age.
Yields:
Bald barleys do not yield as well as hulled barleys, but you can expect 4 tonnes per hectare (1½ tons per acre), or 0.4kg per square metre (8¾ pounds per square yard).
Varieties:
I have bought bald, or naked spring barley from The Koanga Institute here in New Zealand and it is just called Naked Barley and is a tall growing old-fashioned good cropper, but there are named varieties:
Nepal: is a very old spring sown variety.
Taiga: is a German variety that yields 5.8 tonnes per hectare (2 tons per acre), or 0.58kg per square metre (1 pound per square yard).
Retriever: is a true winter feed barley for animals. (PGW Grain).
Sowing:
Prepare the soil and sow the seed as for wheat. Work out how much you, your family or group will use in a year and sow accordingly. Winter barley needs sowing earlier than winter wheat – late March, early April (in the southern hemisphere) and mid September (in the northern hemisphere).
On average bald barley germinates 20% less than hulled barley, so you will need to sow between 190-200kg per hectare (170-179 pounds per acre), or 20g per square metre (¾oz per square yard).
For, Maintenance, Harvesting, Threshing, Winnowing, Storage & Saving Your Own Seed – see WHEAT.
For more information about naked true grains, see: http://www.ancientcerealgrains.org/seedandliteraturecatalog1.html
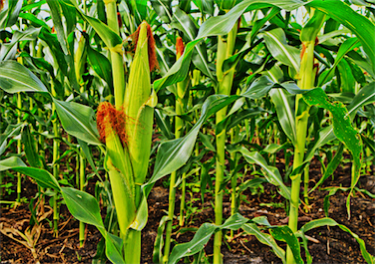
MAIZE (Zea mays subsp. mays) Most historians believe maize was domesticated in the Tehuacan Valley of Mexico. The Olmec and Mayans cultivated it in numerous varieties throughout middle America, cooked, ground or processed it by soaking in an alkali solution of wood ash and water to make the nutrients more available and digestible.
Beginning about 2,500 BC, the crop spread through much of the Americas. After European contact with the Americas in the late 15th and early 16th centuries, explorers and traders carried maize back to Europe and introduced it to other countries. Maize spread to the rest of the world because of its ability to grow in diverse climates and its high yields.
Yields:
Yields can vary hugely from subsistence farming in the highlands of Mexico on poor land of 1 tonne per hectare (367 pounds per acre) to 12 tonnes per hectare (4.3 tons per acre) on conventional farms with high inputs of fertilisers. So let’s use 3-5 tonnes per hectare (1.2-2 tons per acre), or 30-50g per square metre (1-1¾oz per square yard) as a reasonable yield from healthy organic and nutrient balanced soil using an open pollinated heritage variety such as Blue Aztec maize.
Soil Preference:
Maize requires deep fertile and well drained soil, rich in organic matter; however it can be grown in any type of soil ranging from deep heavy clay to light sandy soil as long as the soil is of medium texture with good water holding capacity that is also well drained, as young seedlings are highly susceptible to water logging. Hence the provision of proper drainage is essential for the successful cultivation of this crop. Therefore, the ideal soil is neither clayey nor sandy with a pH of around 6.5.
Feeding:
Maize is a heavy feeder with a high nitrogen requirement, especially if you want a decent crop. Incorporate compost into the soil at 2 buckets + 2 handfuls of Eco or Organic Fertiliser per square metre (square yard). Also give regular liquid feeds during the growing season – see: ‘Maintenance’.
Varieties:
Manaia Maize: is an old NZ heritage yellow maize, especially grown by Maori who often ate it fermented.
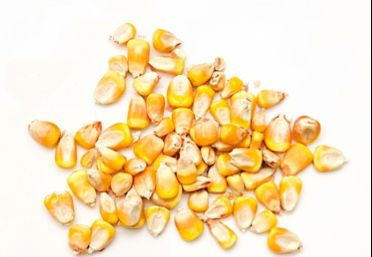
Blue Aztec Maize: this American heritage variety is one we often grow. The 2m (6½ft) tall stalks produce large ears that can be eaten as sweet corn at the milk stage, with the kernel being sweet, tender and very tasty. When mature the corn turns blue-black and makes very delicious corn bread. This corn is hardy and grows in a wide range of conditions.
Blue Hopi: was developed by the Hopi Indians to be used as flour corn, and is the corn used to make the blue corn chips available commercially. The cobs grow large (long) and the plants are drought tolerant, and when ground they produce high quality flour. Excellent for posole, tortillas, polenta and porridge.
Sowing & Planting:
Scatter sow seeds into deep seed trays 2 thirds filled with seed compost, cover with 2cm (¾in) of seed compost and transplant when 4cm (1½in) high and soil temperatures reach 15-16 C (59 F). Plant out at 40cm (16in) apart – diagonal spacing.
Maintenance:
Keep weeded whilst small, then mulch with spray-free straw when they have reached 20-30cm (8-12in) high. Spray and water with seaweed liquid every three weeks during the growing season, plus at least 2 feeds of liquid animal fertiliser during the growing season.
Harvesting:
Pick the cobs when the plants have turned brown and the seeds have become hard. If it is damp in late summer or autumn, lie out the picked cobs in a glasshouse, or tunnel house to dry further before shucking.
")
Maize Husker (Shucker)
Shucking: You can shuck corn by hand, or for a larger scale you will have to buy a corn husker. I was surprised how easy it was to shuck 20 or 30 cobs by hand the first time I did it. You will need to wear garden gloves to protect your hands. Hold the cob with both hands next to each other and twist the cob in opposite directions and the berries will rub off. Be careful not to break the cob in doing so. A little practice and you will get the hang of it. Alternatively buy a hand corn husker, which served the old small farmers very well.

Maize Grinder
Storage:
Store your dried grain in large plastic or metal tubs to protect from moisture and pests.
Preparation:
You will need to buy a corn grinder. We have a SFINX hand corn grinder, which also grinds other grains (see picture above).
Before you grind your corn, you will need to treat it in the traditional American Indian way. Niacin (vitamin B3) and some of the amino acids are unavailable in untreated corn. Soaking and cooking the grain in a lye solution of wood ash and water, softens the grain, turns some of the corn oil into emulsifying agents which make the ground maize stick together in a dough to make tortillas, as well as making the vitamin B3 and some of the important amino acids available for easy digestion and absorption.
Soak the grain for 24 hours in 1 heaped tablespoon of clean wood ash (from untreated hard wood) per cup of dried corn and enough filtered water to cover. It can then be rinsed and spread out on a baking tray to dry in a slow oven at 60-650C (140-1490F) or de-hydrator, then stored or ground into polenta.
Alternatively, slowly cook the whole corn in the wood ash and water that it has soaked in, until the grains have burst right open and fluffed up like pop corn, at which point it can be rinsed and used in soup etc., or wet ground in your grinder to make tortillas or polenta etc.
Cooking:
Polenta
Ingredients:
• 1 litre (2 pints) milk
• ½ tsp. salt
• ¼ tsp. Pepper
• 1½ cups yellow cornmeal
• ½ cup grated Parmesan
• ½ cup shredded Gruyere cheese
Directions:
1. Heat milk, 1 cup of water and the salt and pepper in a large saucepan over medium-high heat until simmering.
2. Whisk in cornmeal and cook, whisking constantly for 3 minutes, or until thick and smooth.
3. Remove from heat; stir in cheeses. Immediately pour into prepared pan, lined with baking paper and spread evenly. Cover and refrigerate 30 minutes, or until firm.
4. Line a baking sheet with foil. Cut polenta into squares or oblongs.
5. Grill for about 5 to 6 minutes until the polenta pieces are lightly browned.
Saving Your Own Seed:
Maize seeds only last 2 seasons – sow seed from last year’s collection then one more year. Sort out the healthiest looking seeds for next years crop and store in a dry box. We store most of our veg and grain seeds in a plastic storage bins with good sealed lids.
Outlook:
It is so easy to grow and process decent crops of maize on a small area, and you end up not just with valuable food but also with lots of high carbon material for your compost heaps.
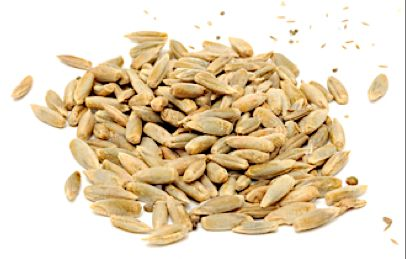
RYE (Secale cereal) Rye is naturally bald so it doesn't need hulling, so is a great grain to grow on a small scale. Rye can also be grown on the same soil for many years without damaging the soil unlike other grains, although personally I would still prefer to rotate it with other crops.
Yields:
You can expect 1.7 tonnes per hectare (¾ ton per acre) or 17g per square metre (14oz per square yard), a lot less than other grains, but still valuable none the less.
Soil Preference:
Rye grows much better in cooler and drier regions than wheat, and also performs well on sandy soils.
Feeding:
Grow in the spring on grassland ploughed in the autumn, or after a pea or bean crop. Otherwise incorporate compost into the topsoil at ½ to 1 bucket per square metre (square yard), or 20 tonnes per hectare (8 tons per acre).
Varieties:
I am sure there are many varieties, but this is the one I know.
Milmore Downs: This traditional rye has been bred and grown organically at Milmore Downs Biodynamic organic farm, north of Christchurch, for many years. The farm grows dinkel, oats, barley, wheat, rye and red lentils, as well as some sheep and cattle. This rye is very tall, providing both grain and a lot of carbon material for composting.
Abruzzi: is an old heritage variety from the US.
Sowing & Planting:
Rye is sown in the autumn in April-mid May southern hemisphere, October-mid November northern hemishere. Rye seeds need light for good germination, so it needs to be sown shallowly into a well-prepared seedbed, at 19g per square metre (¾oz per square yard), or 190kg per hectare (170 pounds per acre) if you sow it outside. On a small scale you can scatter sow seeds into trays, lightly cover, and transplant when they are 5-8cm (2-3in) high when the soil temperature has reached 15-160C (59-600F). Plant at 30cm (12in) diagonal spacing. On a field scale, sow 188kg of seed grain per hectare (161 pounds per acre).
For Maintenance, Harvesting, Threshing & Winnowing & Storage, see: WHEAT
Preparation:
Like all grains, rye contains phytic acids and other anti nutrients, so they were traditionally either fermented (sour dough), sprouted or soaked and cooked for a long slow period to make the grains digestible and nutritious for the human digestive system.
Cooking:
Make your own rye flour sour starter, the same way as with wheat flour. The dough is quite dense, so making pure rye bread in traditional thick loaves means the centre will remain gooey, so baking smaller or flatter loaves baked in pans, is faster and the results are more even than larger loaves.
Bake slowly at 200°C (392°F). Expect rye loaves to take much longer than an all-wheat bread. An average sized loaf of rye bread takes 1-2 hours to bake. To check whether the loaves are thoroughly cooked, tip the bread out of the pan and thump the bottom, if the loaf sounds hollow, it is done. If not, return to the oven quickly and bake longer.
Saving Your Own Seed:
It seems that rye seed lasts several years. Store in metal or thick plastic containers.
Possible Pests and Diseases:
While rye is susceptible to the same insects that attack other cereals, serious infestations are rare.
Outlook:
Although rye yields are lower than most other grains, growing rye has many advantages. Rye excretes a natural herbicide that suppresses many weeds and helps to clean land of weeds. It also has an extensive root system that along with its tall straw adds lots of organic matter to the soil.

Quinoa Flowerhead
QUINOA & AMARANTH (Chenopodium quinoa & Amaranthus caudatus etc.)
Both Quinoa and Amaranth are related to fat-hen or goosefoot (Chenopodium album). In fact the grain of fat hen was used as a crop in the past in Europe and the leaves and grain of fat-hen are still used today in Northern India. Quinoa and Amaranth are two very ancient South American plants. They were held sacred in ancient Inca and Aztec cultures.

Quinoa Seeds

Amaranth Flowerheads
Quinoa is easier to grow, because it can tolerate a shorter cooler season than Amaranth. Amaranth can be grown well in semi sub-tropical areas like North Island, New Zealand. Starting both in seed boxes in the warm, then planting out can extend the growing season.

Amaranth Seeds
Quinoa and Amaranth are higher in protein than the true grains, which are the grasses, such as wheat, barley, oats, rice, maize, sorghum, millet, etc. The protein content of Quinoa and Amaranth have an essential amino acid balance that is near the ideal, and comes closer to meeting the genuine protein requirements of the human body than either cow's milk or soybeans. They are high in the amino acid lysine, which is lacking in most cereals such as wheat, sorghum, corn and barley. Quinoa has great potential, as a high food value grain for those who wish to grow at least some of their staple food.
Quinoa is easy to grow and harvest using traditional hand-harvesting methods. Quinoa and amaranth are quite adaptable, disease-free and drought-tolerant plants. They thrive in rich soil—as long as it is well drained—but both will, once established, produce abundant harvests under dry conditions.
Yields:
30-60gm (1-2oz) of seed per plant is common but you can easily get over 170gm (6oz) per plant grown in rich soils. Normal commercial yields for amaranth and quinoa are 1-2 tonnes per hectare (½-¾ ton per acre), or 100-200gm per sqaure metre (3oz per square yard), but up to 5 tonnes per hectare (2 tons per acre), or 0.5kg per square metre (9 pounds per square yard) have been harvested in Mexico where traditional hand harvesting and bio-intensive growing methods were used! Yields are not as high as wheat, but when the increased food value is taken into account, Quinoa and Amaranth are very valuable crops to grow, even if you don’t have enough land available to grow all your needs.
Soil Preference:
Quinoa and Amaranth are hungry crops, so a winter green manure of lupins and oats or other legumes preceding planting, plus two buckets of compost per square metre (square yard) and two feeds of a high Nitrogen liquid feed, such as animal dung liquid, worm farm juice, or stinging-nettle liquid manure, during the growing period is ideal. Plants grown in average garden soil will be 1 metre to 2 metres (3-6½ft) tall. Optimum soil is a well-drained loam but both plants will do well in all but poorly aerated clay soils.
Feeding:
2 buckets of well rotted compost per square metre (square yard), lightly incorporated into the top soil should be enough.
Varieties:
Quinoa:
Temuco: Quinoa is normally found in high altitudes, but ‘Temuco’ is a variety of Quinoa selected for ease of growing at sea level. In sub-tropical areas it is possible to grow two crops in one season, but cooler areas with shorter summers it will be only possible to grow crop. The seeds of this variety are blond which means they have less saponin in the seed coat, which means you don’t have to rinse them for so long to remove the bitterness.
Four Seasons: crops in a slightly shorter season than Temuco, so better for cooler areas with shorter seasons. Crops very well.
Amaranth:
Aurelia's Verde is a heritage amaranth from Guatemala. Easy to grow.
Sowing & Planting:
Quinoa & Amaranth can be sown directly outside from the middle of spring onwards, but it is better to sow seed in trays in early spring to be planted out later, when it has started to get warmer. The small seeds of amaranth and quinoa will germinate more successfully with a finely prepared surface and adequate moisture. Seeds should be sown no more than 6mm (¼in) deep.
Plant out in rows 45cm (18in) apart with 30cm (12in) between the plants, or plant the ‘Biointensive’ way 40cm (16in) diagonally apart. 10g (½oz) of seed will sow a 150m (492ft) row, or sow 1kg per hectare (1 pound per acre). Since seed is small, you can avoid considerable thinning by mixing it with sand or radish seed before sowing, as is sometimes done with carrots. Amaranth and quinoa are low-maintenance crops but weeds, especially at the beginning, should be discouraged by cultivation or mulching. Quinoa and amaranth appear slow growing at first but when the plants reach about 30cm (12in) in height, they start to grow very rapidly.
Maintenance:
Both Amaranth and Quinoa are extremely drought tolerant and do well on a total of 25cm (10in) of water or less though a growing season, which is handy if you live in a drier area. Keep weeded, especially in the early stages, then water and mulch when 6-8cm (2½-3in) high.
Harvesting:
Quinoa is ready to harvest when the leaves have fallen, leaving just the dried seed-heads.
Quinoa resists light frosts especially if the soil is dry. So long as maturing seed is past the green stage, frost will cause little damage and harvesting can be done a day or two later. It is important to watch the weather when quinoa is ready to be harvested: if rained on, the dry seed can germinate. If the heads are not completely dry, harvest them when you can barely indent the seeds with your thumbnail. They should then be thoroughly dried in a glasshouse, Polytunnel, or warm dry shed before storage.
Amaranth keeps on flowering until hit by the first hard frost. Seed will often ripen many weeks before that, usually after about three months. The best way to determine if seed is harvestable is to gently but briskly shake or rub the flower heads between your hands and see if the seeds fall readily. (Numerous small and appreciative birds may give hints as to when to start doing this!) An easy way to gather ripe grain is, in dry weather, bend the plants over a bucket and rub the seed-heads between your hands.
Cutting and hanging plants to dry indoors does not work very well: the plants become extremely brittle and it is difficult to separate the seed from the chaff.
The best time to harvest amaranth is in dry weather three to seven days after first frost—a condition not easily met in many places.
Threshing & Winnowing:
Unlike true grains, quinoa and amaranth have no hulls to remove. Quinoa seeds can be easily stripped upwards off the stalk with a gloved hand.
The next task is to sieve the threshed material.
1. Sieve through a standard 9mm (⅖in) garden sieve. This will get rid of the courser material – straw bits, leaves and seed heads, keeping the material that has fallen through.
2. Next sieve through a 3.5 or 4mm (1/10-1/5in) sieve or colander. This will pass through the seeds + some finer material + dust.
3. Next sieve out the dust by sieving through a standard 1mm kitchen sieve, fine garden or professional chefs sieve. Keep the material and seed left in the sieve.
4. Next winnow the seeds to remove the fine lighter material (chaff) from the heavier seeds. To separate the chaff from Amaranth and Quinoa, place the seeds and remaining rubbish in a wheelbarrow and blow away the finer chaff using an air compressor, or lay a plastic sheet out when there is a gentle wind and slowly drop the seed onto it at the windward end and the seed will drop nearest to you and the lighter chaff will blow downstream, or do this indoors on a plastic sheet using an electric fan.
Storage:
After harvesting, it is important to further dry your crop to ensure it won't mould in storage. It can be left on trays in the hot sun or in a glasshouse, or placed near an indoor heat source. Stir occasionally until it is as dry as possible. Store the seed in airtight containers in a cool dry place.
Preparation:
Quinoa is covered with a bitter substance called saponin, which helps to put birds off to some extent. Because of this coating, quinoa requires thorough rinsing before cooking.
The way I do it is the way I learnt from Sally Fallon’s book ‘Nourishing Traditions’. I place the required amount of seed in a kitchen sieve and wash thoroughly under the cold tap for a minute or so; then soak for 12 hours minimum in warm filtered water mixed with some whey, cultured butter milk or yogurt (1 cup quinoa + 3 cups water + 1 tablespoon whey, yogurt, kefir or buttermilk). The next day place back in the sieve and rinse under the cold tap again for a minute or so. This neutralises the saponin as well as the enzyme inhibitors such as phytic acid very successfully.
Amaranth has no saponin and no hulls, but it is still good to soak over night in water and whey as for quinoa, to neutralise the phytic acid.
Cooking:
Basic recipe: Bring equal volumes of amaranth/quinoa and water to a boil, reduce to a simmer, cover, and cook until all water is absorbed. Amaranth takes about 10-12 minutes and quinoa 12-15 minutes. For a more porridge-like consistency, use a greater proportion of water. Experiment to find the texture you prefer.
‘Temuco’ quinoa makes a great milk pudding like rice pudding.
Quinoa and amaranth both contain about 16% protein, E and B vitamins, calcium, iron and phosphorous. They are easy to digest and have wonderful flavour. Their simple distinctive taste gives them great versatility for cooking purposes. They can be substituted for other grains in many recipes, though they are much more filling. Because they are not true cereal grains, they can be eaten by people who suffer from cereal grain allergies.
Young quinoa and amaranth greens make tasty salad material and are high in vitamins (especially calcium and iron), minerals and protein.
Carrots juiced with a small amount of either leaves make a most invigorating drink.
Older greens are wonderful steamed, stir-fried or incorporated into curries or casseroles. Some varieties have better greens than others and are usually so indicated in seed catalogues. One of the tastiest amaranths grown for greens is called Tampala. Amaranth is also called Chinese Spinach because of its popularity as a green vegetable in that country.
Saving Your Own Seed:
Amaranth cultivars will cross with each other as will quinoa cultivars, so grow only one kind of each or separate cultivars by as much distance as you can. Certain varieties, such as purple-leaved amaranth, are easier to select for than others. Lamb's-quarters is difficult to tell apart from quinoa when the seedlings are young seedlings, but quinoa has more pointed leaves. Also Lamb’s quarters has a greater branching habit than quinoa and smaller flower heads.
Outlook:
Quinoa and amaranth have exciting possibilities for the home gardener, or small farmer, looking for hardy, easy-to-grow high-protein foods. They have higher food quality than our common grains such as wheat and oats, and they don't have hulls that need to be removed by machinery prior to cooking. From my own success with growing amaranth and quinoa over several years, I would say that the difficulties in cultivating and preparing these two grains are relatively minor and that the pleasures obtained in growing and eating them are definitely major.

Millet in flower
MILLET (various species)
Millet has been grown in East Asia for the last 10,000 years and as such is one of the oldest grains in cultivation. The term millet refers to a variety of grains, some of which do not belong to the same genus.

Millet Seeds
Millet is a good source of some very important nutrients, including copper, manganese, phosphorus, and magnesium, also essential amino acids and vitamins (thiamine, riboflavin, niacin). Total carbohydrates 14%, protein 12%.
Yields:
You can expect between 1 to 2 tonnes per hectare (½-¾ ton per acre), or 100-200g per square metre (3oz per square yard), or even a bit more.
Soil Preference:
Millet requires light and warm fertile organic rich soils that are moisture retentive. It is more resistant to high temperatures and drought than barley and wheat but emerging plants are very sensitive to cold weather – optimum 15-20°C (59-68°F). The growing season varies from 60 to 110 days.
Feeding:
Like maize, millet is a heavy feeder, requiring a good amount of nitrogen and the other nutrients. If it is sown into newly ploughed grass sward, or follows a bean, pea or potato crop that has been well composted, that should be adequate otherwise 1 bucket of compost per square metre or 20 tonnes per hectare (8 tons per acre).
Varieties:
Foxtail (Setaria italic): This is an ancient grain that has been found in Neolithic tombs in China, and has made golden porridge in China for Centuries. It only grows to 1 metre (3ft) at maximum and is therefore easy to cover against birds. The seed heads stand up then hang down like a fox's tail hence the name. This millet is easy to thresh and hull ready for eating.
Proso (Panicum miliaceum): A very, very ancient and nutritious cereal, very, very rare glutinous trait millet. Very quick maturing, and very attractive to birds; however it is low growing, so it’s easy to cover. This millet produces a mass of tan coloured quite large (for millet) seeds that are relatively easy to thresh and hull.

Foxtail Millet
Baryard (Echinochloa esculenta): is an easy to grow variety, the only problem being that it is 2 metres (6½ft) high and is more difficult to cover against birds. However if you are able to protect the crop it is a good one to grow. Barnyard millet is a traditional Japanese cultivar, and millet was once the main grain eaten in Japan. Barnyard millet is also a great producer of carbon for compost making.
Sowing & Planting:
Scatter sow into trays early October, covering with 2cm (½in) seed compost. Transplant into beds when 5-8cm (2-3in) high at 10cm (4in) diagonal spacing. Or sow outside at 1.5g per square metre (square yard), or larger areas at 15kg per hectare (13 pounds acre).
Maintenance:
On a small scale you can lightly scatter-mulch with spray-free straw to maintain moisture and keep down weeds. Millet likes regular watering in a dry period.

Barnyard Millet
Harvesting:
Harvest when seed begins falling and mature in green house before harvesting and winnowing. To save seeds cut the mature seed heads from the stems.
Threshing & Winnowing:
The mature seeds will be swollen and release easily from the cluster by simple rubbing. Allow the seed heads to dry for a few days to facilitate easy removal of the seeds. For threshing and winnowing on a larger scale see WHEAT.
Storage: Once the seeds are released from the stem allow them to dry for a few more days before storing in metal containers or thick plastic tubs or boxes with good seals.
Preparation:
Like all grains, millet contains phytic acids and other anti nutrients, which can be neutralised by soaking 2 cups of whole millet in 4 cups of warm filtered water, plus 4 tablespoons of whey, yogurt, kefir or cultured buttermilk and left in a warm place for at least 7 hours, or overnight.
Cooking:
Millet can be cooked flaked as porridge, or whole similar to rice or ground to make flour or meal.
Saving Your Own Seed:
Millet seed lasts for 2-4 years if kept cool and dry.
Outlook:
This is another valuable and easy grain to grow on a small scale. It threshes easily and provides valuable gluten-free food.

Sorghum in flower
SORGHUM (Sorghum bicolor) Sorghum originated in northern Africa, and is now cultivated widely in tropical and subtropical regions, however, we grew a very successful crop of ‘Mennonite’ sorghum at Nelson Community Gardens, New Zealand a few years ago, which has mild winters and longish summers.

Sorghum Seeds
Sorghum is the world's fifth most important cereal crop after rice, wheat, maize and barley. You not only get a valuable nutritious gluten-free grain, and you can chew on the canes like sugar cane, or press the syrup from the stalks and boil it down into 1 litre (2 pints) of thick syrup from only 2 square metres (2¼ square yards) of land; you also have lots of 2 metre (6½ft) high carbon material for compost making!
Sorghum has high nutritional value, with high levels of oils, protein, fibre, and minerals like phosphorus, potassium, calcium, and iron. It also has more antioxidants than blueberries and pomegranates. Recent research suggests that sorghum contains certain phytochemicals that reduce the risk of colon and skin cancer, and that other properties in sorghum can promote cardiovascular health and lower cholesterol.
Yields:
Figures vary hugely from 1.37 to 12.7 tonnes per hectare (0.6 to 5 tons per acre)! But for our purposes we can assume 4.0 tonnes per hectare (1.6 tons per acre) as a reasonable estimate.
Soil Preference:
Sorghum is well adapted to growth in hot, arid or semiarid areas and is often grown in areas where it is impossible to grow other types of grain. However, it can be grown just as easily on fertile land in warm temperate regions as long as it can have dependable hot summers.
Varieties:
Both these varieties grow to 2m (6½ft).
Mennonite: This is the variety we grew successfully at Waimarama Community Gardens, Nelson New Zealand. It is a great grain variety and syrup can also be pressed from the stems. It has large seed heads. The seed is orange/brown in colour.
White Seeded: This variety has large white seeds that are easily threshed and cleaned, and pop just like popcorn. The stems can also be pressed to make syrup.
Sowing & Planting:
To get the longest growing season possible, it is best to sow seeds undercover and plant out when the weather warms up. Plant into deep seed trays, or into cardboard toilet role centres filled with seed compost. Transplant into the garden well after the last frosts, at 30cm (12in) diagonal spacing when 5-10cm (2-4in) high and soil temperature has reached around 150C (590F). It is advisable to cover the crop with frost fleece at night, taken off each morning for the first week; or if you are only growing a few, you can cover each plant at night with plastic cloches made from 5 litre clear plastic juice bottles with the bottoms cut off.

Individual covers on the seed heads
Maintenance: The plants grow tall, over 2m (6½ft) so it’s quite hard to keep the birds off the seed heads however, if you have a relatively small crop you can tie covers over each individual seed head. At Waimarama Community Gardens, we grew about a 12 square metre (14 square yard) block of sorghum and covered the whole block with fine netting supported on canes, at least 15cm (6in) away from the seed heads, and with the bottom of the netting pinned down.
Harvesting:
Cut the seed heads off with about 30cm (12in) of the stem left on, and hang up the bunches in a glass house or warm dry outhouse.
Threshing & Winnowing:
They can be threshed easily by rubbing over a sieve then winnowing, or on a larger scale see: WHEAT - Threshing & Winnowing:
Storage:
Store in metal containers or thick plastic tubs or boxes with good seals.
Preparation:
See: MILLET – Preparation: for details.
Cooking:
The large seeds can be boiled as a grain crop and taste a lot like lentils. The seeds also pop well for use as a breakfast cereal.
Saving Your Own Seed:
Sorghum seed stays viable for 4 years.
Outlook:
As long as you can protect the ripening crop from bird damage and you live where there are long hot summers, this is a very valuable grain to grow. We grew sorghum here in Nelson, so it should be possible in warm temperate areas, with decent summers.
FOR MORE INFORMATION SEE:
Grow Your Own Grains, Raising, Harvesting & Uses – Ecology Action Booklet 2008, ISBN: ECOLGROW – obtainable direct from www.growbiointensive.org USA
or in New Zealand – www.koanga.org.nz or www.touchwood.co.nz
BOOKS:
Small-Scale Grain Raising by Gene Logsdon - ISBN: 978-1-60358-077-9
Home-grown Whole Grains – Grow, Harvest and Cook Your Own Wheat, Barley, Oats, Rice and More, by Sara Pitzer – ISBN: 978-1-60342-153-9